Unity Code Architecture and Dependency Injection
TL;DR: I use dependency injection in Unity when tracing who calls what starts hurting, not by default. In Floorcraft Blasters, RootInstaller binds interfaces to services, constructors ask for dependencies, and Bootstrap starts contexts in order. I skip Zenject for a lighter manual container. Add DI when tests, scale, or scene wiring push you there.
There is no such thing as the “perfect” game architecture. If you set out to find one, you will come up empty handed. Every project is different, and no single structure works for every type of game. This article is about code level architecture and dependency injection. Floorcraft Blasters is my running example here. I use it because I know that codebase end to end and it keeps the article grounded in real project code, not a toy demo.
Architecture depends on context
No one knows what the perfect architecture is because it does not exist. It is always situational. What works for a tiny prototype can fall apart at scale, and the reverse happens too. How you wire things up depends on the project, the team, and your own experience. Most devs learn through trial and error and patterns picked up from others. There is no single blueprint everyone accepts, no matter what you read online. I am not claiming the Floorcraft architecture is the best you can choose. It is the shape I like working in, and that is why I decided to write about it here.
What is Floorcraft Blasters
Floorcraft Blasters is a game by Auki Labs that was later open sourced. You can get the code here: Floorcraft Blasters source. It was built by Auki developers, not by me, but I am a former Auki employee and worked on it in the past. In 2026, I am maintaining the open-source version. It is a feature-rich project with a lot to learn from, and it uses ConjureKit. This project predates AI, so there is no AI slop in it. I am not paid to promote Auki. I am covering this because it is full of good examples and content for my blog.
Typical Unity coupling and what composition fixes
I do not reach for dependency injection until I know what problem it is supposed to fix. Without that, using it is pointless.
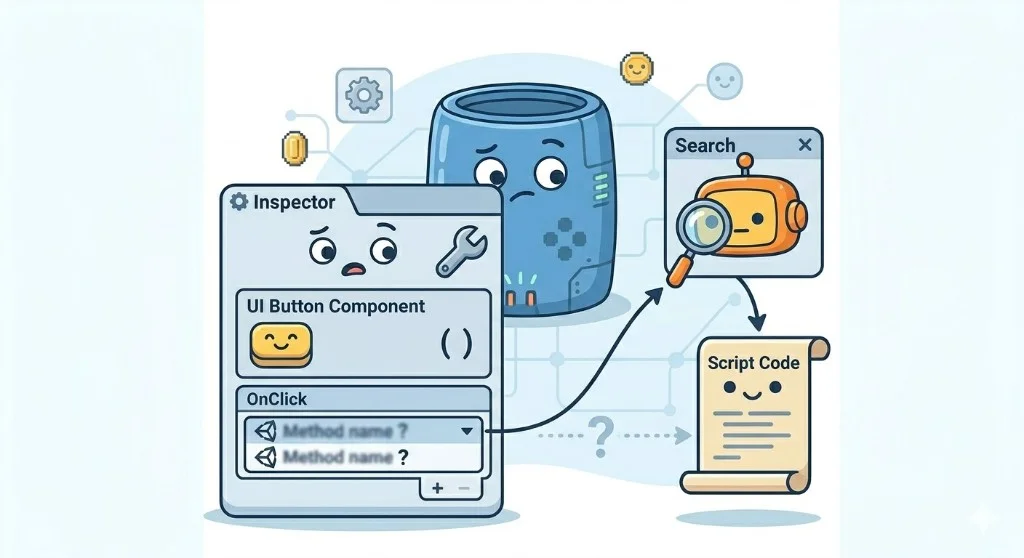
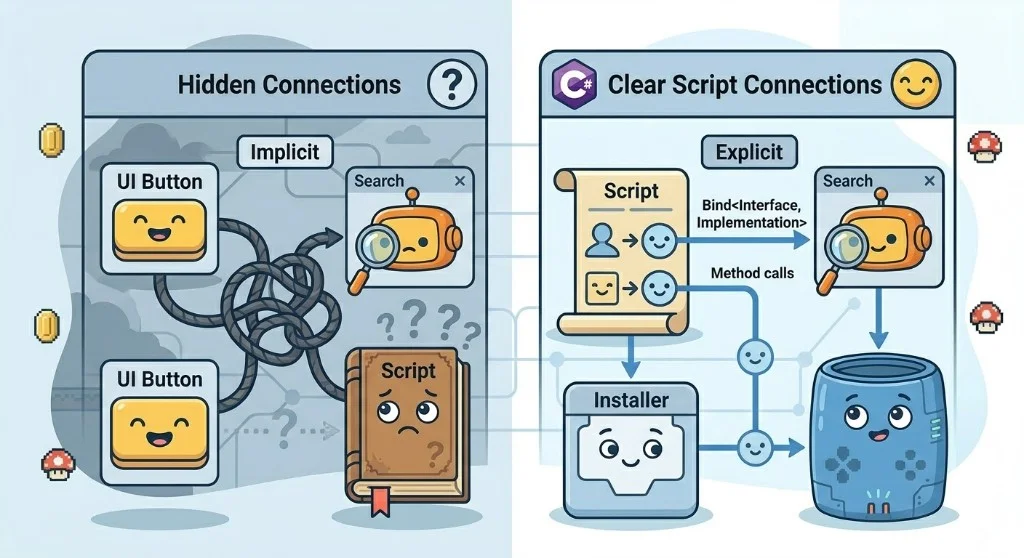
In the usual Unity style, MonoBehaviours can call into anything from anywhere. Nothing in the language stops one script from grabbing another. Over time you stop being able to memorize the graph. Who calls who is no longer obvious just from reading code. The worst case for me is when the call is wired in the editor, for example a UI Button onClick pointing at some method. The invocation is invisible to search. You look up the type and still cannot see who triggers it without opening inspectors and scenes and hunting by hand. You can fix that with discipline or tooling, but Unity does not enforce it by default.
In Floorcraft I use installers so I do not rebuild that mess. Each layer has one place where types get bound. Classes take what they need through the constructor or the injector. I am not chaining [SerializeField], FindObjectOfType, and GetComponent across the hierarchy just to connect two pieces. There is learning up front. After that I can always trace a reference back to where it was wired.
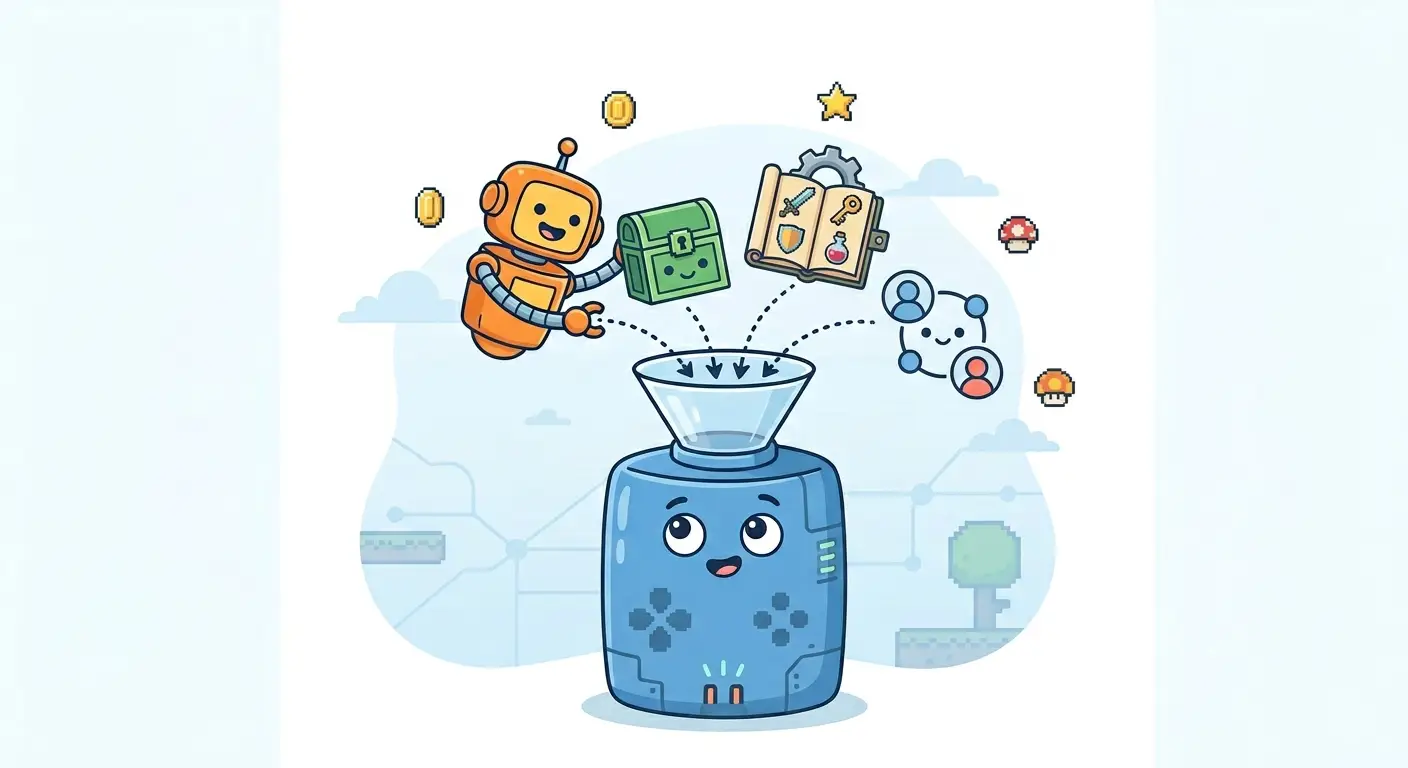
What dependency injection is, in plain English
Most classes need other objects to work. The real question is who creates those objects and who hands them in.
Without dependency injection, the class often grabs its own helpers. new, GetComponent, FindObjectOfType, [SerializeField] references in the inspector, a singleton. That is fine for a quick test. It gets painful when you want to test properly, swap a fake in, or read the whole call graph without hunting.
With dependency injection, the class asks for what it needs in the constructor. Something else builds the real objects and passes them in. In Floorcraft that something else is the installer chain. RootInstaller and the installers under it are where that wiring happens.
The rest is plumbing.
Floorcraft Interfaces
In Floorcraft, many services do not take concrete types in the constructor. They take interfaces (INetworkService, IRecordingService, IMarkerService, and similar). The consumer calls through that interface. The installer is where the real class is chosen (Bind<INetworkService, NetworkService>() style). The service only needs to know which operations exist, not which type implements them.
If C# interfaces are still new to you, I have a short video on my channel that walks through them: C# interfaces.
KISS version. I keep interfaces simple. If one interface gets too big, I split it. If a class only has one clear use and will not change, I use the concrete type directly. I add an interface when I want easier testing, cleaner swaps, or less coupling.
When someone asks where interfaces and installers meet in Floorcraft, I point at RootInstaller first. The code is below.
How Floorcraft wires dependencies
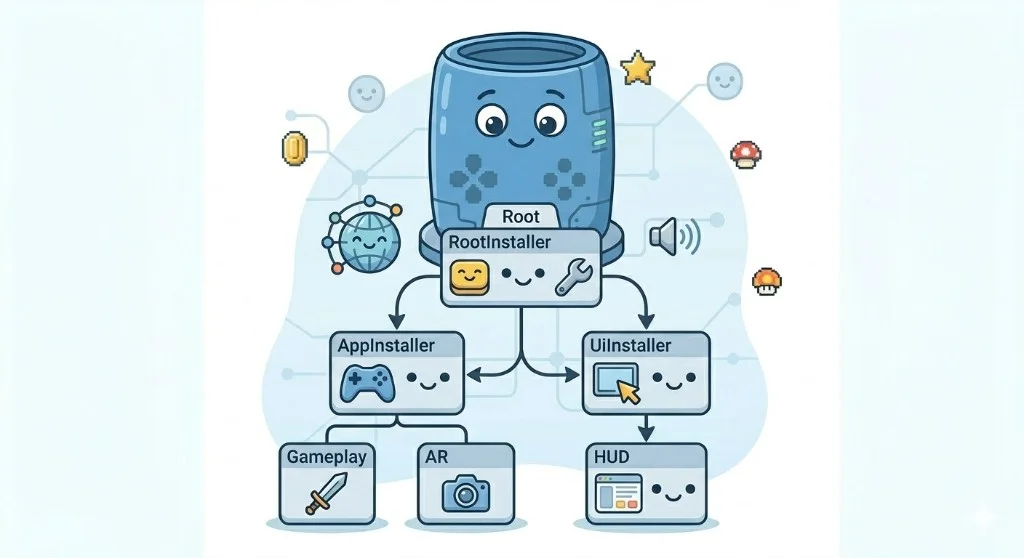
In Floorcraft, RootInstaller is the top level wiring file. It sets up shared systems like network, audio, localization, and startup services.
Then the work is split into smaller installers. AppInstaller wires gameplay systems. UiInstaller wires HUD and menu flow. DebugInstaller adds debug tools when that build supports them.
After wiring, Bootstrap starts things in order so gameplay is ready before UI tries to use it. In DI terms, this installer setup is the composition root, which just means the place where object wiring happens.
I pulled the snippets from matterless/floorcraft-blasters, develop branch. File paths read the same as in that checkout.
This is the first wiring point I check in Floorcraft. It runs in RootInstaller during startup and decides what exists app wide. Focus on BindInstance for shared scene data and Bind<Interface, Implementation>() for service mapping. I also look at the final Bootstrap bind because startup order depends on it. If this file is off, later bugs show up far away from the real cause.
In this setup, container is the object that holds the Bind... rules from the installers. When a constructor asks for INetworkService, those rules tell the injector which concrete type to build and pass in.
Bootstrap starts the ObjectContext scopes when the app boots. That is when the injector resolves constructor parameters and builds the services inside each scope, instead of hiding wiring behind inspector-only references.
The binding list is long because Floorcraft has a full stack, but the rule stays the same. Ignore the project-specific names. Look at where the bind points and what the constructors request.
protected override void InstallBindings()
{
    SetupRendering(m_AppConfigs.renderingSettings);

    container.BindInstance(m_AppConfigs.aukiSettings);
    container.BindInstance(m_AppConfigs.aukiSettings.mannaSettings);
    container.BindInstance(m_AppConfigs.networkServiceSettings);

    container.BindInstance(m_arSessionOrigin);
    container.BindInstance(m_arSession);

    if (Application.isEditor && m_UseAukiWrapperMock)
        container.Bind<IAukiWrapper, AukiWrapperMock>();
    else
        container.Bind<IAukiWrapper, AukiWrapper>();
    container.Bind<IMannaService, MannaService>();

    container.Bind<IPoolingService, PoolingService>();
    container.Bind<BacktraceService>();
    container.Bind<IRemoteConfigService, RemoteConfigService>(m_EnvironmentSettings.remoteConfigSettings);
    container.Bind<IAnalyticsService, AnalyticsService>(m_AppConfigs.analyticsSettings);

    container.Bind<IPlayerPrefsService,PlayerPrefsService>();
    container.Bind<ICoroutineRunner, CoroutineRunner>(this);
    container.Bind<IUnityEventDispatcher, UnityEventDispatcher>(this.gameObject);
    container.Bind<IAudioService, AudioService>(m_AudioDatabase, false);
    container.Bind<AudioUiService>(m_AppConfigs.audioUiSettings);
    container.Bind<ILocalisationService, LocalisationService>();
    container.Bind<IDdsAuthenticationService, DdsAuthenticationService>(m_AppConfigs.aukiSettings);
    container.Bind<IRestService, RestService>();
    container.Bind<IInputDialogueService, InputDialogueService>();

    container.Bind<SplashScreenService>(m_AppConfigs.splashScreenSettings, m_EnvironmentSettings.version);
    container.Bind<Bootstrap>(m_AppContext, m_UiContext, m_DebugContext, m_AppConfigs);
    container.Bind<INetworkService, NetworkService>();
}
This file is the UI only wiring pass. I keep it separate so HUD setup does not leak into gameplay setup. The first line to watch is arguments[0] as AppConfigs, that is where this installer receives shared config from the parent context. Then it binds UI settings and registers UI services like UiFlowService and HeaderUiService. If these binds move around, UI behavior gets harder to trace.
protected override void InstallBindings()
{
    var appConfig = arguments[0] as AppConfigs;

    container.BindInstance(appConfig.vehicleSelectorSettings);
    container.BindInstance(appConfig.placeableSelectorSettings);
    container.BindInstance(appConfig.obstacleSettings);
    container.BindInstance(appConfig.connectionIndicationSettings);
    container.BindInstance(appConfig.networkServiceSettings);
    container.BindInstance(appConfig.audioUiSettings);
    container.BindInstance(appConfig.rendererSettings);

    container.Bind<HeaderUiService>();
    container.Bind<SidebarUiService>();
    container.Bind<UiFlowService>();
    container.Bind<IRendererService, RendererService>();
    container.Bind<IntroUiService>();
    container.Bind<IVehicleSelectorService, VehicleSelectorService>();
    container.Bind<PlaceableSelectorService>();
    container.Bind<SpawningService>();
    container.Bind<ConnectionIndicatorService>();
    container.Bind<QrCodeUiService>();
    container.Bind<ObstaclesUiService>();
    container.Bind<IRecordingService, DummyRecordingService>();

    container.Bind<IScreenService, ScreenServiceLocked>();

    container.Bind<WalletUiService>();
}
This is the startup order in code, not in inspector wiring. I read it for one reason, app context starts first and UI context starts after it. ObjectContext is the scope that wires services for a layer, it is not a scene. The remote config wait and the extra frame yields are there so context startup does not race. Services are created when the context starts and reused within that started context. Debug context only starts on non shipping defines. If this order breaks, the HUD can ask for services that are not ready yet.
IEnumerator StartApp()
{
    yield return null;

    m_AukiWrapper.onJoined += session =>
    {
        StartMusic();
    };

    while(m_WaitForRemoteConfigs)
    {
        yield return null;
    }

    m_AppContext.StartContext(m_AppConfigs);

    yield return null;

    m_UiContext.StartContext(m_AppConfigs);
#if !MATTERLESS_PROD && !MATTERLESS_APPSTORE
    m_DebugContext.StartContext(m_AppConfigs);
#endif
}
How to use dependency injection in a service and view
The sections above explain the architecture. This section is the practical path. If I add one new UI feature, these are the exact steps I follow in Floorcraft style.
Step 1. Bind instances first, then bind services.
BindInstance is for existing objects and settings. Bind<T> and Bind<I,T> are for services the container should create.
// RootInstaller or AppInstaller
container.BindInstance(m_AppConfigs);
container.BindInstance(m_arSession);

container.Bind<INetworkService, NetworkService>();
container.Bind<ConnectionService>();
If a constructor needs AppConfigs, ARSession, or INetworkService, those lines are why injection works.
Step 2. Add the new UI service to UiInstaller.
// UiInstaller.InstallBindings()
container.Bind<HeaderUiService>();
container.Bind<SessionStatusUiService>(); // new service
That is the registration step. Without it, the container has nothing to build.
Step 3. Write the service with constructor injection.
public class SessionStatusUiService
{
    private readonly ConnectionService m_ConnectionService;
    private readonly INetworkService m_NetworkService;
    private readonly SessionStatusUiView m_View;

    public SessionStatusUiService(
        ConnectionService connectionService,
        INetworkService networkService)
    {
        m_ConnectionService = connectionService;
        m_NetworkService = networkService;

        m_View = SessionStatusUiView.Create("UIPrefabs/UIP_SessionStatus").Init();
        m_View.onReconnectClicked += OnReconnectClicked;

        m_ConnectionService.onConnectionStateChanged += OnConnectionStateChanged;
        m_NetworkService.onNetworkConnectionChanged += OnNetworkConnectionChanged;
    }

    private void OnReconnectClicked()
    {
        // trigger reconnect flow or open multiplayer panel
    }

    private void OnConnectionStateChanged(ConnectionState state)
    {
        m_View.SetStatus(state == ConnectionState.Connected ? "Connected" : "Disconnected");
    }

    private void OnNetworkConnectionChanged(ConnectionStatus status)
    {
        m_View.SetStatus(status == ConnectionStatus.Connected ? "Connected" : "Disconnected");
    }
}
This is the key idea. The service does not fetch dependencies with FindObjectOfType or scene lookups. It asks in the constructor, the installer chain provides them.
Step 4. Bind buttons in the view, not in random scene links.
public class SessionStatusUiView : UIView<SessionStatusUiView>
{
    [SerializeField] private Button m_ReconnectButton;
    [SerializeField] private TMP_Text m_StatusText;

    public event Action onReconnectClicked;

    public override SessionStatusUiView Init()
    {
        m_ReconnectButton.onClick.AddListener(() => onReconnectClicked?.Invoke());
        return this;
    }

    public void SetStatus(string value)
    {
        m_StatusText.text = value;
    }
}
Now the click flow is traceable in code. Button -> View event -> Service method. Search finds every step.
The event Action in the view is the same pattern most Unity devs still get wrong. I wrote about when to use C# events versus UnityEvent, and why = instead of += wipes out your listeners, in Most Unity devs still don't understand events.
Step 5. Rule of placement when adding dependencies. If the dependency is platform or shared runtime, bind in RootInstaller. If it is gameplay or ECS logic, bind in AppInstaller. If it is HUD, menu, or flow logic, bind in UiInstaller.
MVCS in plain terms (services, views, controllers)
In Unity, one controller class often gets too much responsibility. It starts handling game rules, network logic, and UI behavior all at once. In Floorcraft, that logic is moved into services so classes stay smaller and easier to read.
A service is plain C#, not a MonoBehaviour. It can still update UI through view classes. For example, HeaderUiService decides when to show or hide multiplayer UI, and HeaderUiView applies that change in Unity UI.
For this article, MVCS just means a practical split: views render, services hold logic, and controller code stays small.
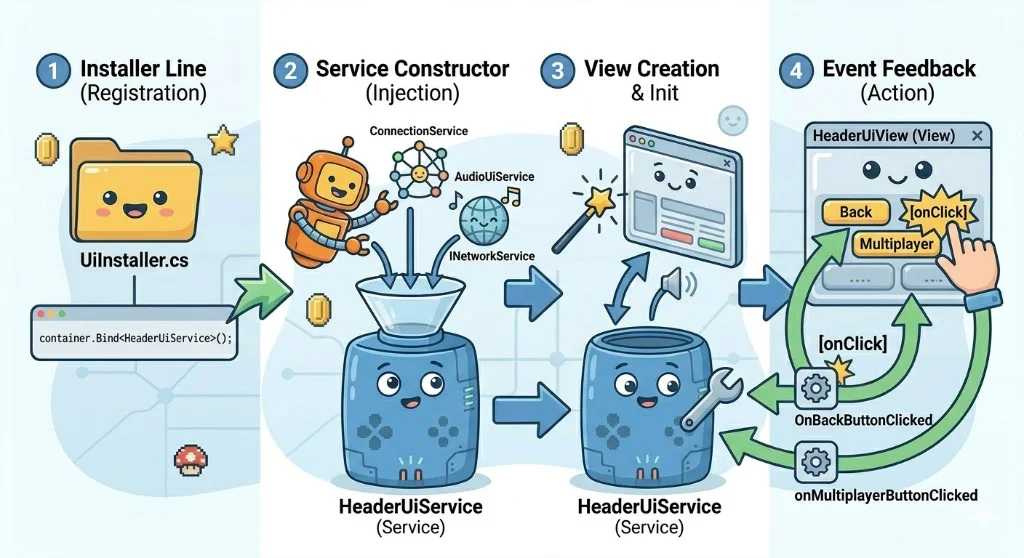
This is where header behavior lives. HeaderUiService gets dependencies in the constructor, creates both header views, and hooks their callbacks in one place. Then connection events update both views through SetMultiplayerButtonVisibility. The service decides when state changes, and the views only render it. If this logic spreads across random MonoBehaviour scripts, UI flow gets harder to follow.
public class HeaderUiService : ITickable
{
    public Action onMultiplayerButtonClicked;

    private readonly HeaderUiView m_VerticalView;
    private readonly HeaderUiView m_HorizontalView;
    private readonly ConnectionService m_ConnectionService;
    private readonly AudioUiService m_AudioUiService;
    private readonly INetworkService m_NetworkService;

    public HeaderUiService(
        ConnectionService connectionService,
        AudioUiService audioUiService,
        INetworkService networkService)
    {
        m_ConnectionService = connectionService;
        m_AudioUiService = audioUiService;
        m_NetworkService = networkService;

        m_VerticalView = HeaderUiView.Create("UIPrefabs/UIP_HeaderView").Init();
        m_VerticalView.onBackButtonClicked += OnBackButtonClicked;
        m_VerticalView.onMultiplayerButtonClicked += OnMultiplayerButtonClicked;
        m_VerticalView.onNewSessionButtonClicked += OnNewSessionClicked;

        m_HorizontalView = HeaderUiView.Create("UIPrefabs/UIP_HeaderView_Horizontal").Init();
        m_HorizontalView.onBackButtonClicked += OnBackButtonClicked;
        m_HorizontalView.onMultiplayerButtonClicked += OnMultiplayerButtonClicked;
        m_HorizontalView.onNewSessionButtonClicked += OnNewSessionClicked;
        m_HorizontalView.Hide();

        m_ConnectionService.onConnectionStateChanged += OnConnectionStateChanged;
        m_NetworkService.onNetworkConnectionChanged += OnConnectionStatusChanged;
    }

    private void OnConnectionStateChanged(ConnectionState state)
    {
        bool isReady = state == ConnectionState.Connected;

        m_VerticalView.SetMultiplayerButtonVisibility(isReady);
        m_HorizontalView.SetMultiplayerButtonVisibility(isReady);
    }

    private void OnConnectionStatusChanged(ConnectionStatus connectionStatus)
    {
        bool isReady = connectionStatus == ConnectionStatus.Connected;

        m_VerticalView.SetMultiplayerButtonVisibility(isReady);
        m_HorizontalView.SetMultiplayerButtonVisibility(isReady);
    }
}
This is the rendering side. HeaderUiView keeps Unity UI references and exposes events. Init maps button onClick to those events, and HeaderUiService subscribes to them. That means search lands on real code, first in the view for hookup and then in the service for behavior. I prefer this over hidden inspector links to unrelated methods.
public class HeaderUiView : UIView<HeaderUiView>
{
    public event Action onBackButtonClicked;
    public event Action onMultiplayerButtonClicked;
    public event Action onNewSessionButtonClicked;

    [SerializeField] private Button m_BackButton;
    [SerializeField] private Button m_MultiplayerButton;

    [SerializeField] private Text m_VersionText;
    [SerializeField] private TMP_Text m_ConnectionText;
    [SerializeField] private RawImage m_RawImage;
    [SerializeField] private Button m_NewSessionButton;

    public override HeaderUiView Init()
    {
        m_BackButton.onClick.AddListener(()=>onBackButtonClicked?.Invoke());
        m_MultiplayerButton.onClick.AddListener(() => onMultiplayerButtonClicked?.Invoke());
        m_NewSessionButton.onClick.AddListener(() => onNewSessionButtonClicked?.Invoke());
        return this;
    }
}
Why this is AI friendly
A big advantage of the Floorcraft architecture is that wiring lives in code, not mostly in the editor. In many Unity projects, button clicks and object links are wired in the inspector, so the call path is hidden inside scene serialized fields.
In Floorcraft, services and installers show those relationships in plain C# through constructor parameters and installer binds. That makes it easier for humans and tools to trace dependencies without opening inspectors and scenes.
Drawbacks and tradeoffs
This setup helps a lot, but it does not fix everything.
The biggest problem right now is split state. UI state and game state can live in different places, with separate mini state machines. Then you must update state in multiple scripts, and things go out of sync.
Dependency injection helps with wiring. It does not automatically give you one central state owner. If you want reliable flow, you still need one clear source of truth for important states, or strict sync rules.
Other tradeoffs are simpler: there is a learning curve, there is boilerplate, and for small prototypes this can feel heavy compared to drag-and-drop Unity.

Zenject versus manual style injection
When I talk about dependency injection in Unity, people often mention Zenject. I have used it. It does the job. I do not reach for it on new projects.
Zenject brings a full .NET style container into the game. Binding sugar, attributes, reflection, lifecycle hooks. That is a lot of framework surface. When something breaks, I spend time decoding Zenject errors instead of reading my own code.
It also pulls you toward its installers and contexts as the main organizing idea. I want scene flow and lifecycles I can see. I want breakpoints where my brain expects them. Zenject does not always match that.
What I use instead is the Auki injection base or a small container I write myself. Services get built and bound in installers. The startup line stays visible. Constructors and plain objects. No mandatory base classes or reflection tricks.
I still wire through interfaces, swap mocks in tests, and keep ownership clear. The code just reads like Unity C# to me, not like a web stack dropped into a project.
Zenject can work if your team wants that model. For my taste, lighter manual style wiring has been easier to maintain over the long run.
Dispatcher and Update cost in practice
This DI setup feels complete because it pairs with one dispatcher loop. Services that need per-frame work implement ITickable, and the dispatcher runs those tickables from one update path instead of scattering frame logic across lots of MonoBehaviour callbacks.
People often say Unity reflection is why Update gets slow. That story is usually oversimplified. The pain shows up when too many update callbacks fire every frame and each one does a little, but the native to managed callback boundary and dispatch overhead still add up.
That is what the dispatcher does here. Services that need per frame work are registered like normal dependencies. Then the dispatcher runs one update path and iterates the subscribed tickables in plain C#. In other words, DI builds the services, and the dispatcher runs them.
The result is simple. One place to profile, one place to control update flow, and no random Update scattering across unrelated MonoBehaviour scripts.
This does not mean every Unity project needs a dispatcher. Small games can stay on normal Update methods when the callback count is reasonable. Profiling decides when it becomes worth it.
Why testing pushes people toward DI
Testing is the strongest practical reason to use dependency injection. Without DI, a lot of Unity code pulls dependencies from scene objects, singletons, or static state. That makes tests slow to set up and hard to isolate.
With DI, a service asks for collaborators in the constructor. In tests, I can pass a fake implementation instead of booting half the game.
var fakeNetwork = new FakeNetworkService();
var fakeAudio = new FakeAudioUiService();
var connection = new ConnectionService(fakeNetwork);

var service = new HeaderUiService(connection, fakeAudio, fakeNetwork);
Now the test can focus on behavior. I can simulate connection changes and assert that the right UI method was called, without loading scenes or wiring inspector callbacks.
This does not mean every project needs full DI from day one. It means DI becomes valuable the moment tests start hurting, especially when UI logic, networking, and gameplay state begin crossing paths.
Should I use dependency injection
Most of the time, I do not use dependency injection as often as people expect. I still like the idea behind it, clear ownership and explicit wiring, but I do not treat it as mandatory.
Beginners often hear about DI and think it is something they must learn before they can build games. That is not true. You can ship real Unity projects without it.
Dependency injection is not a requirement. It is one architecture system. Use it when the project actually needs that level of structure, usually when systems are growing, multiple features share the same services, and tracing dependencies is starting to hurt.
If your project is still small, I would keep it simple first. Plain classes, clean method boundaries, and fewer hidden scene links already gets you most of the benefit.
My practical rule is this. Add DI when you feel repeated pain, not because you saw a pattern online. If changing one feature keeps breaking unrelated systems, if testing is painful, or if nobody can trace who depends on what, that is usually the right time.
One extra suggestion for beginners. Even without DI, start writing classes as if DI will be added later. Keep constructors explicit, pass dependencies in where possible, avoid global singletons, and avoid hiding critical flow in inspector only callbacks. That keeps the migration easy if you outgrow the simple setup.
If this kind of Unity architecture framing resonated, the natural follow on is DOTS. What is Unity DOTS. Should you learn it in 2026? Is it useful? is the best plain English DOTS explanation I have on the site, what it is, when it helps, and whether it is worth your time now.
