How do I Use AI in Unity for Free? 2026 Tutorial
Part of Unity AI, my index of AI in Unity coverage.
TL;DR: I walk through my free AI setup inside Unity using MCP for Unity, the open source package that wires the Model Context Protocol into the Editor. The package and local server cost nothing. You still pay for whichever assistant you run, like Cursor, Claude, or ChatGPT, but you skip Unity's own paid tool.
In this article I explain how I run AI inside Unity. You do not need a paid assistant built only for Unity. I use free tools. This is the setup I keep on my own machine.
A note before you dive in. This setup assumes you already know what you are building. If you are still learning C# and Unity, wiring up MCP will not rescue a weak foundation. I wrote a separate piece on that exact order in how to actually learn Unity in 2026 in the age of AI, where AI is a tutor instead of a code writer.
I am not new to AI. I have been using it for real work since 2022. On the web side, assistants kept getting better at understanding a codebase because almost everything important lives in files the editor can read. Unity never quite caught up to that pace. You have C# scripts, but you also have scenes, prefabs, the asset database, and editor state that do not reduce to a simple text tree.
Since 2024 I have been on Cursor, and I still use it every day. It works fine inside Unity projects for scripts and prose. The hard part is still project awareness. For a typical web app the tool can follow imports and paths and stay grounded. In Unity, a lot of what matters is not exposed the same way, so the model can miss how things actually connect.
That gap is what MCP for Unity is built for. It connects the Model Context Protocol to the Editor so an assistant can run tools against your project instead of inferring everything from partial files. I only started using it recently, and I want to walk you through how I got it running.
How do I use AI in Unity for free?
I used the word “free” in the title for a specific reason. MCP for Unity and the local server do not cost anything as standalone pieces. You are not paying for them the way you would for a Unity Asset Store tool.
The part that does cost money is the assistant you talk to. I pay for Cursor. Claude and ChatGPT fall into the same category, whether that is a subscription or API usage. MCP just connects the Unity Editor to that client. It does not remove that layer or its cost.
So when I say “free” in this article, I mean the MCP for Unity package and the local server side. It also means you can skip paying for Unity’s own AI product if that was the expense you were trying to avoid.
Some MCP clients let you route requests to a self hosted or open model instead of the major hosted APIs. Qwen usually comes up in that conversation. I am not presenting that as a plug and play setup. What you can run depends on your editor and how you host or route the model. For that part, you will need to follow your client’s documentation. Unity does not cover it alongside the Editor setup steps.
What is Unity MCP
MCP for Unity is an open source Unity package and a local server. Your MCP client talks to that server, and the server talks to the running Editor. The model gets callable tools for scenes, GameObjects, scripts, packages, and other Editor work, not only what it can infer from files on disk.
It is MIT licensed and maintained by Coplay. You pair it with Cursor, Claude Desktop, VS Code, or another client that supports MCP over HTTP or stdio.
What problem does Unity MCP solve?
The friction is the same as always. A coding assistant mostly sees files. Unity work is not only files. Scenes, the Hierarchy, Package Manager, play mode state, and a long list of Editor actions live behind menus and internal APIs. If the model only edits text, it can suggest a manifest change or a script edit and still leave you to click through Unity, fix versions, or clean up a wrong assumption.
MCP for Unity fixes that by exposing tools the model can call with structured input and structured answers straight against the Editor. You get operations such as managing GameObjects, assets, packages, the console, and more without turning every task into a guessing game from disk alone. The package can also sync skills (where your client supports them) so the assistant gets tighter guidance on how to use those tools for Unity work.
That direct control saves time. Fewer round trips where you paste screenshots or explain what the Scene view shows. Fewer half-applied manifest edits. With your approval in the client, the assistant can run the same Editor actions you would click through yourself, so setup and iteration stay in one loop.
How to install uv
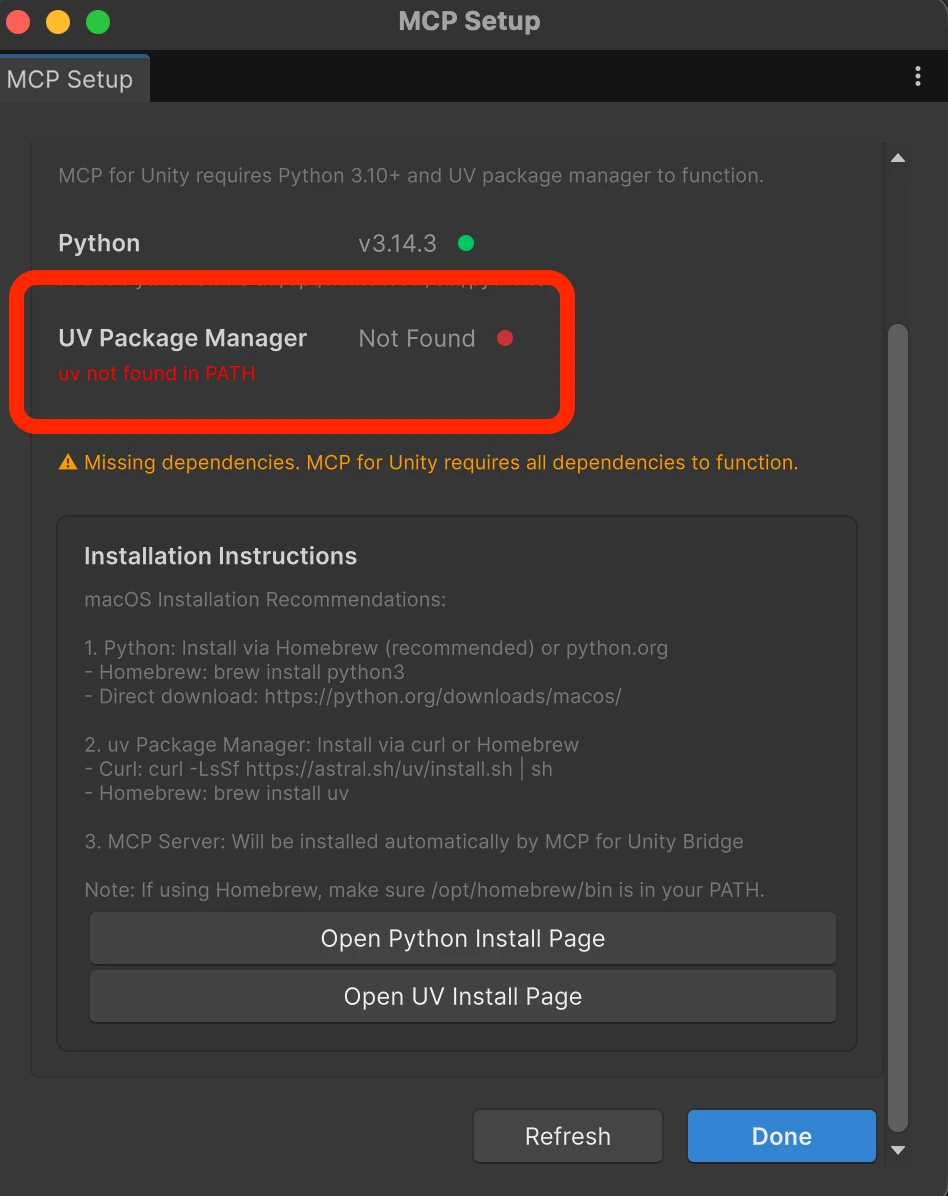
You need uv before MCP for Unity can finish setup. Think of it as a small helper that installs and runs the Python MCP server for you. You are not hand-wiring pip and virtualenvs. Unity’s MCP window looks for uv on your machine PATH and for Python 3.10 or newer. Install steps below match Astral’s official uv install guide.
If MCP Setup shows uv as missing or not found in PATH (red status), install uv with the steps in the next sections. The window looks like this when Unity cannot see uv yet.
Windows
Pick one of these, then open a new PowerShell or Command Prompt and run uv --version.
WinGet: winget install --id=astral-sh.uv -e
Scoop: scoop install main/uv
PowerShell installer: powershell -ExecutionPolicy ByPass -c "irm https://astral.sh/uv/install.ps1 | iex"
If you used the PowerShell installer, uv often lands under %USERPROFILE%\.local\bin\uv.exe. Unity sometimes does not see a fresh PATH until you restart the Editor.
Linux and macOS
Pick one approach, then open a new terminal and run uv --version.
macOS with Homebrew: brew install uv
macOS or Linux with Astral’s shell installer: curl -LsSf https://astral.sh/uv/install.sh | sh If you do not have curl, use wget -qO- https://astral.sh/uv/install.sh | sh instead.
On Apple Silicon Macs with Homebrew, the binary is often /opt/homebrew/bin/uv.
Back in Unity
Quit Unity fully and start it again so the MCP window can see uv on PATH.
If Window → MCP for Unity still reports uv missing, use Choose UV Install Location and point at the real executable. On Windows try
%USERPROFILE%\.local\bin\uv.exe. On macOS with Homebrew (Apple Silicon), try/opt/homebrew/bin/uv.In MCP Setup click Refresh until uv shows green, then Done and continue with the rest of the MCP flow.
How to install Unity MCP
Open the project on GitHub: github.com/CoplayDev/unity-mcp.
Copy the Git URL for Package Manager. I paste
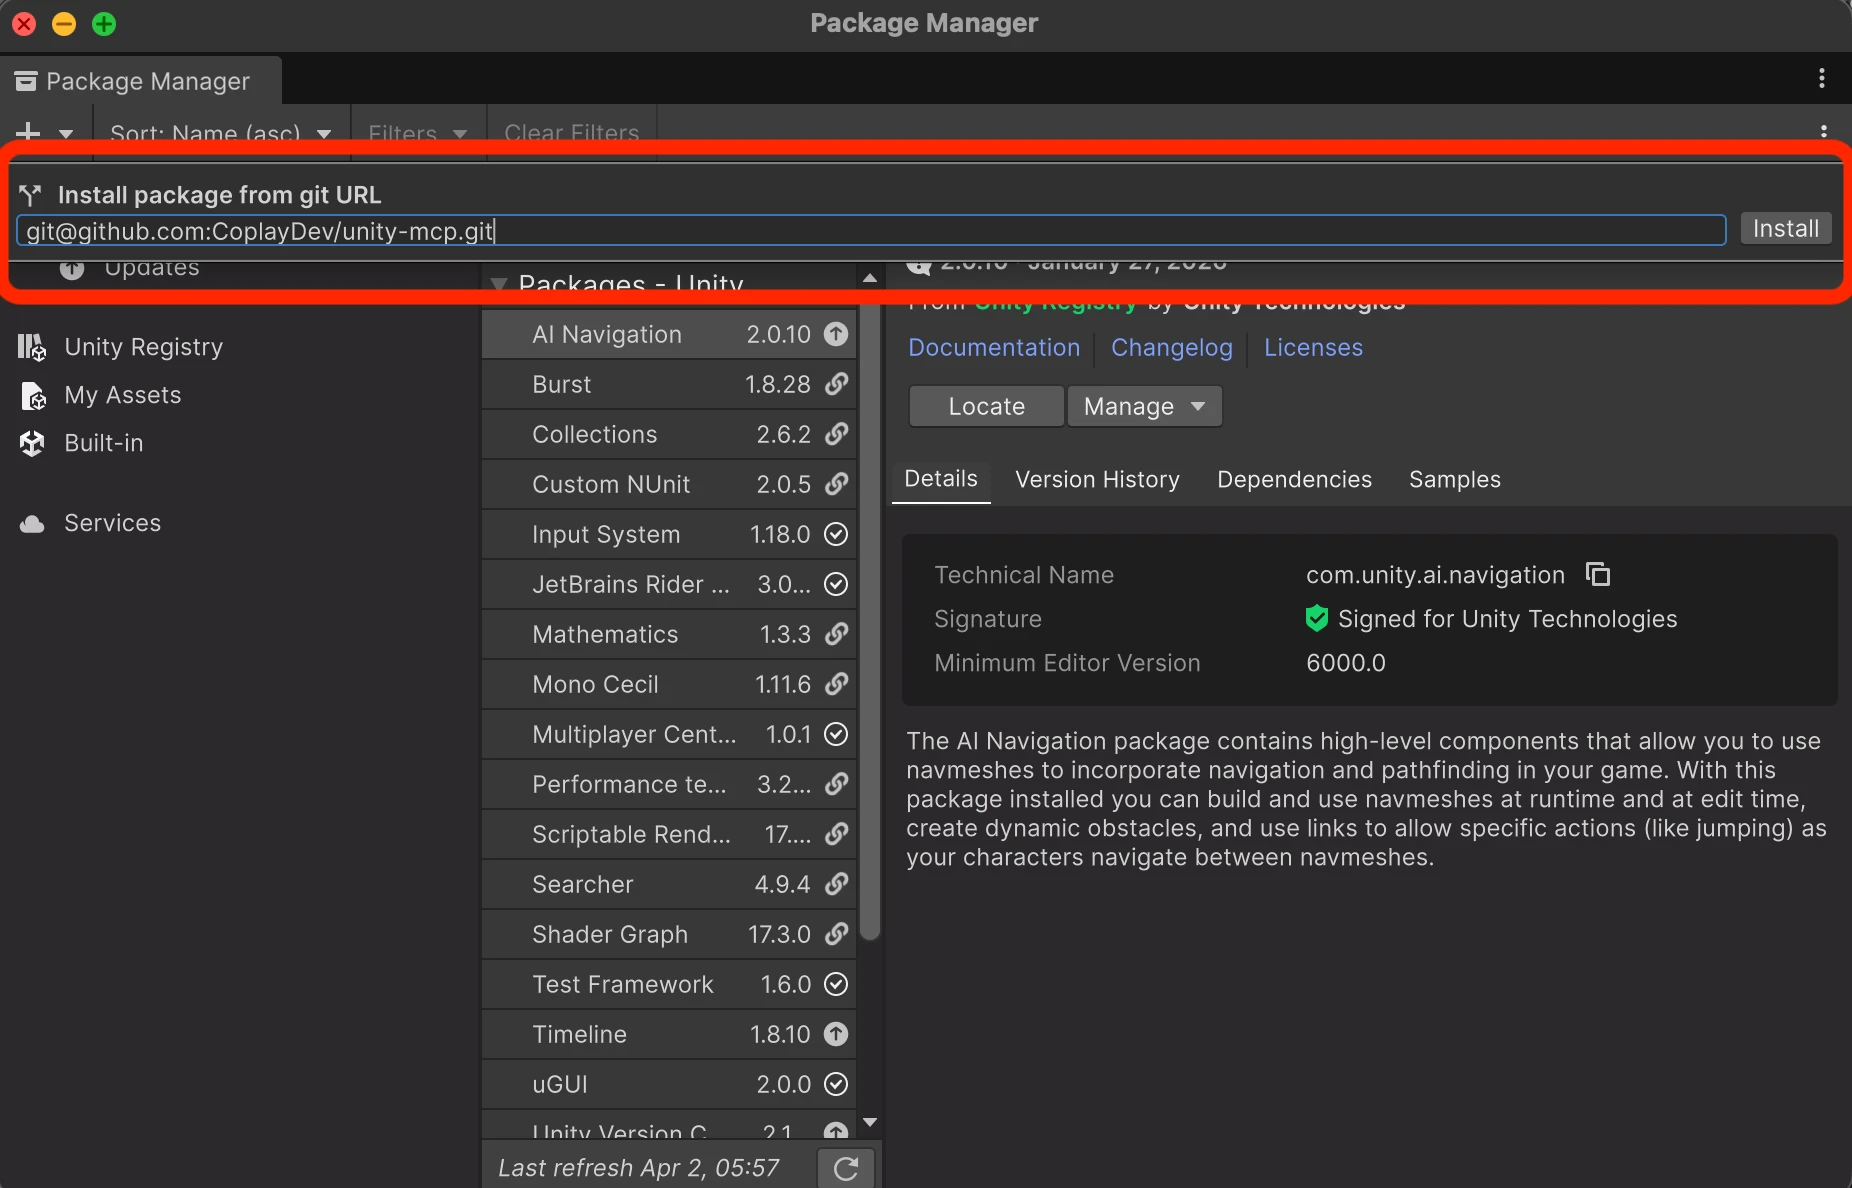
https://github.com/CoplayDev/unity-mcp.git?path=/MCPForUnity#main.In Unity go to Window then Package Manager.
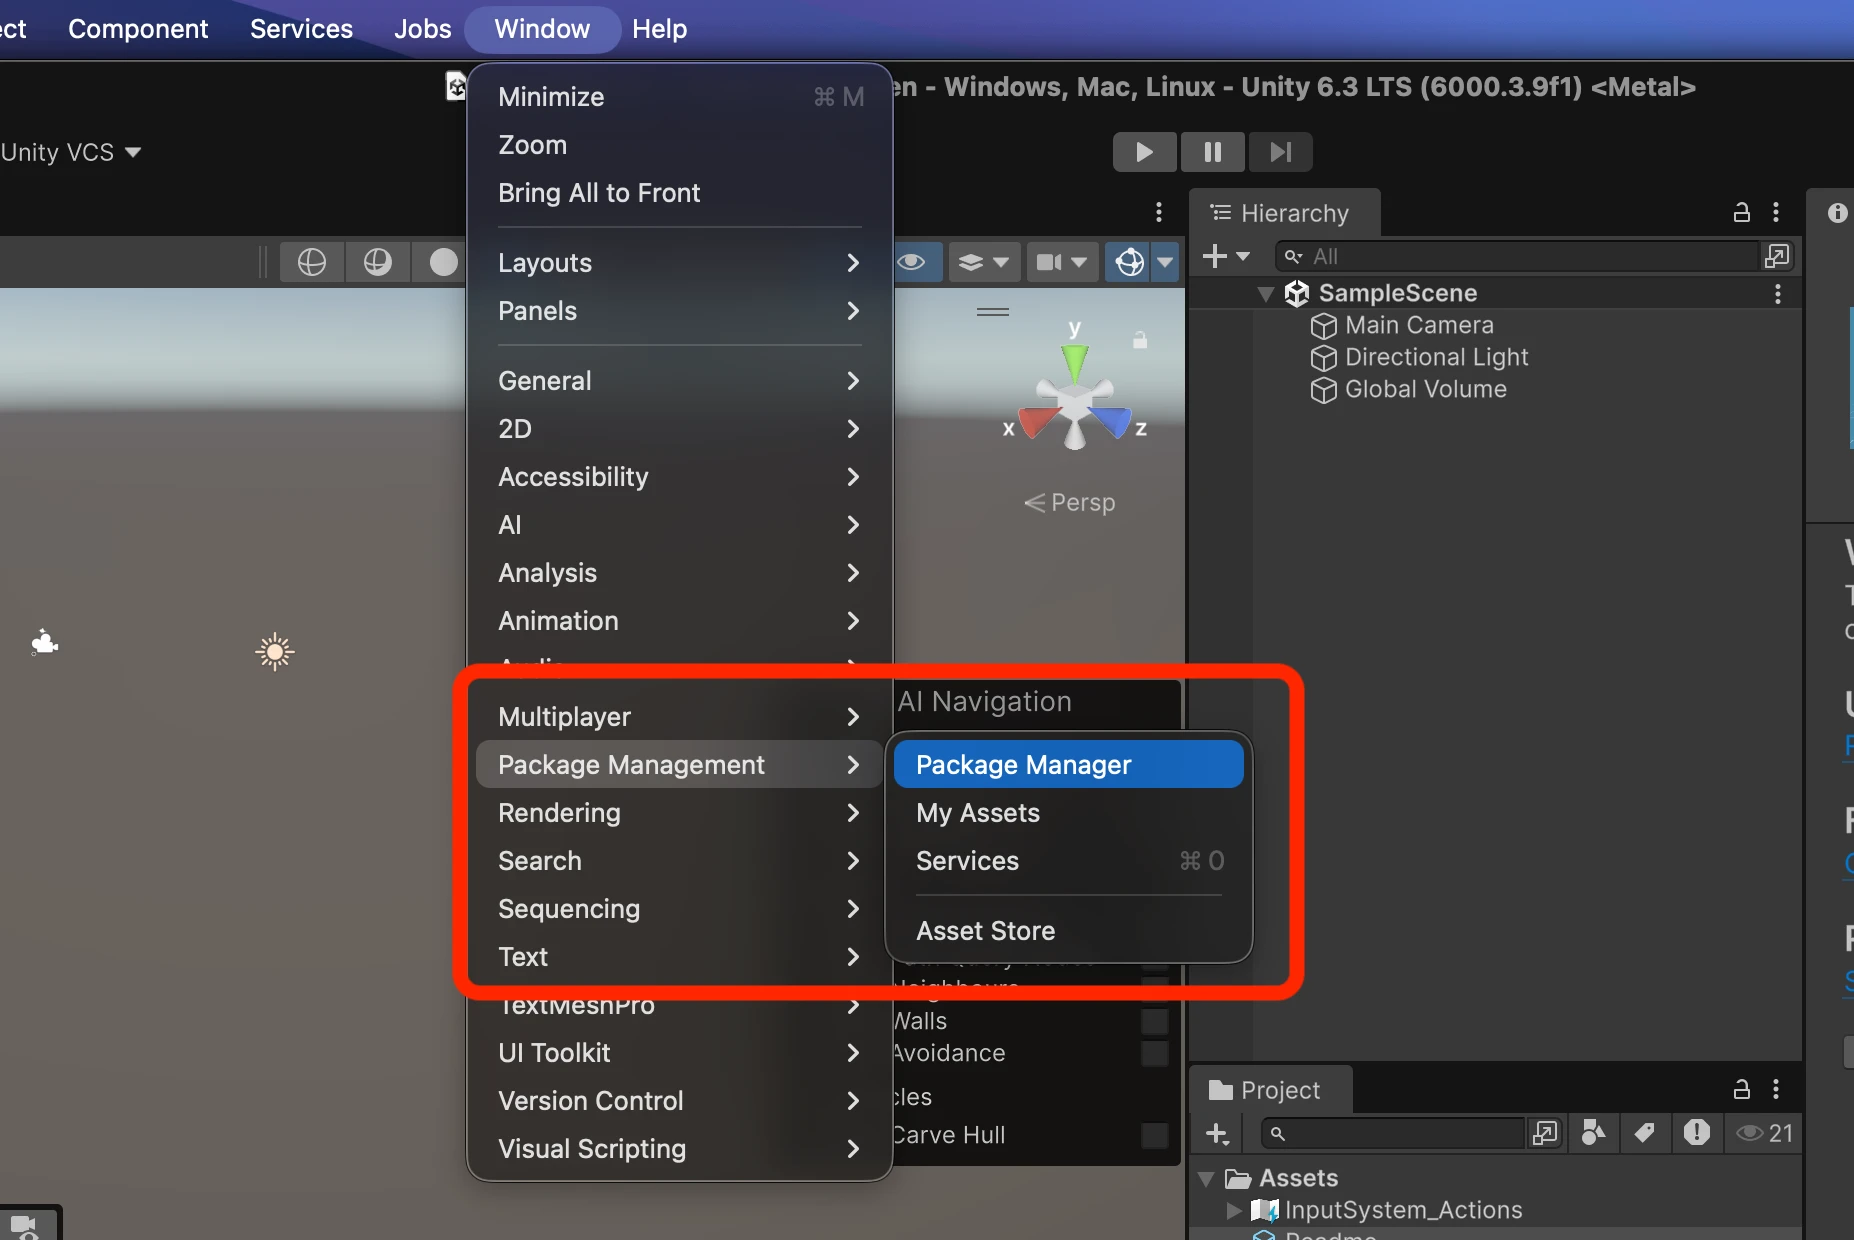
- Click the + in the top right of the Package Manager window.
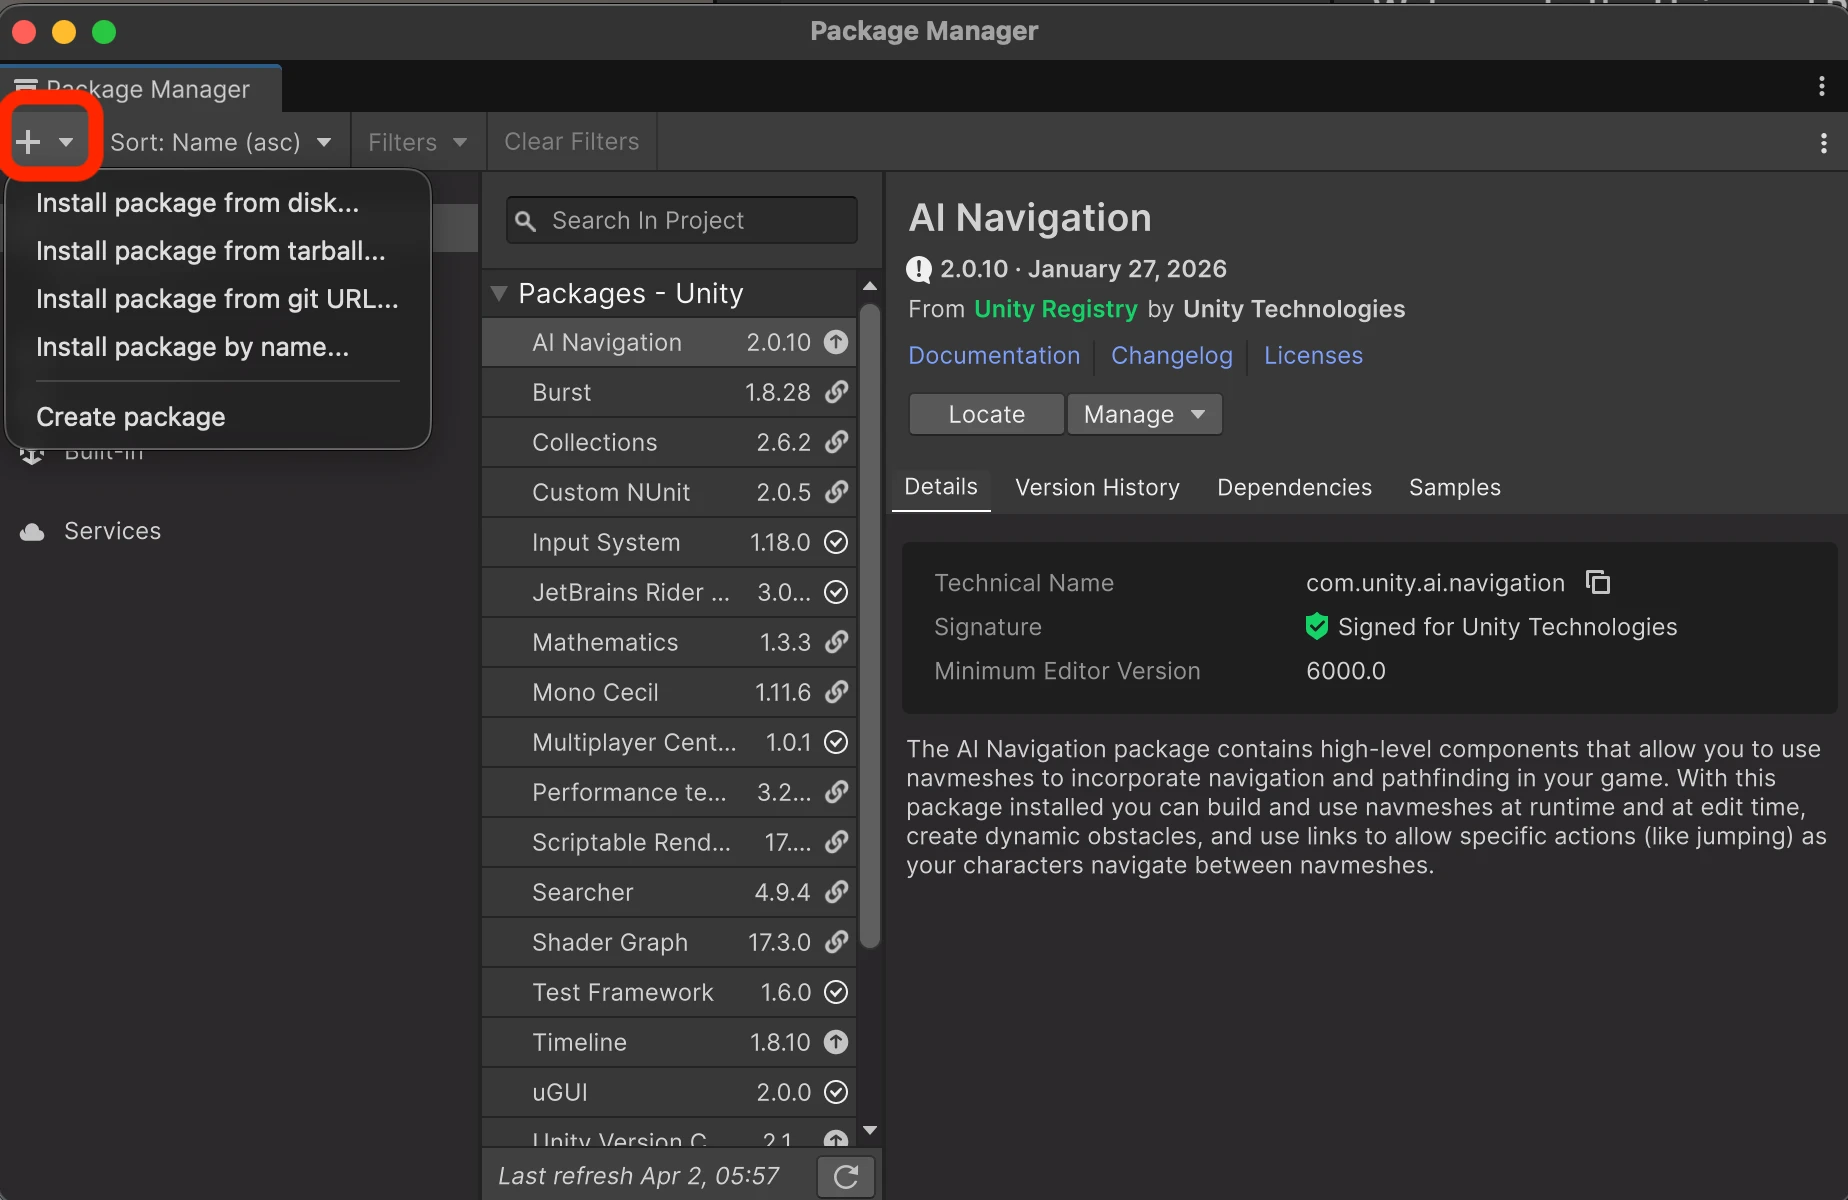
Choose Add package from Git URL...
Paste the URL and click Install.
For the latest beta line, swap #main for #beta at the end of that URL. Details stay in the repo README.
Setup finished
When installation and MCP setup complete successfully, open the Console and look for a log like this. It is normal UnityEngine.Debug.Log output from the package.
MCP-FOR-UNITY: Setup marked as completed
UnityEngine.Debug:Log (object)
If you see MCP-FOR-UNITY: Setup marked as completed, MCP for Unity has marked its setup as done.
Configure your AI IDE for MCP
After the package and uv are in place, open the main MCP window: Window → MCP For Unity → Toggle MCP Window. On macOS I use Shift+Cmd+M. On Windows the same menu entry shows the shortcut for your OS.

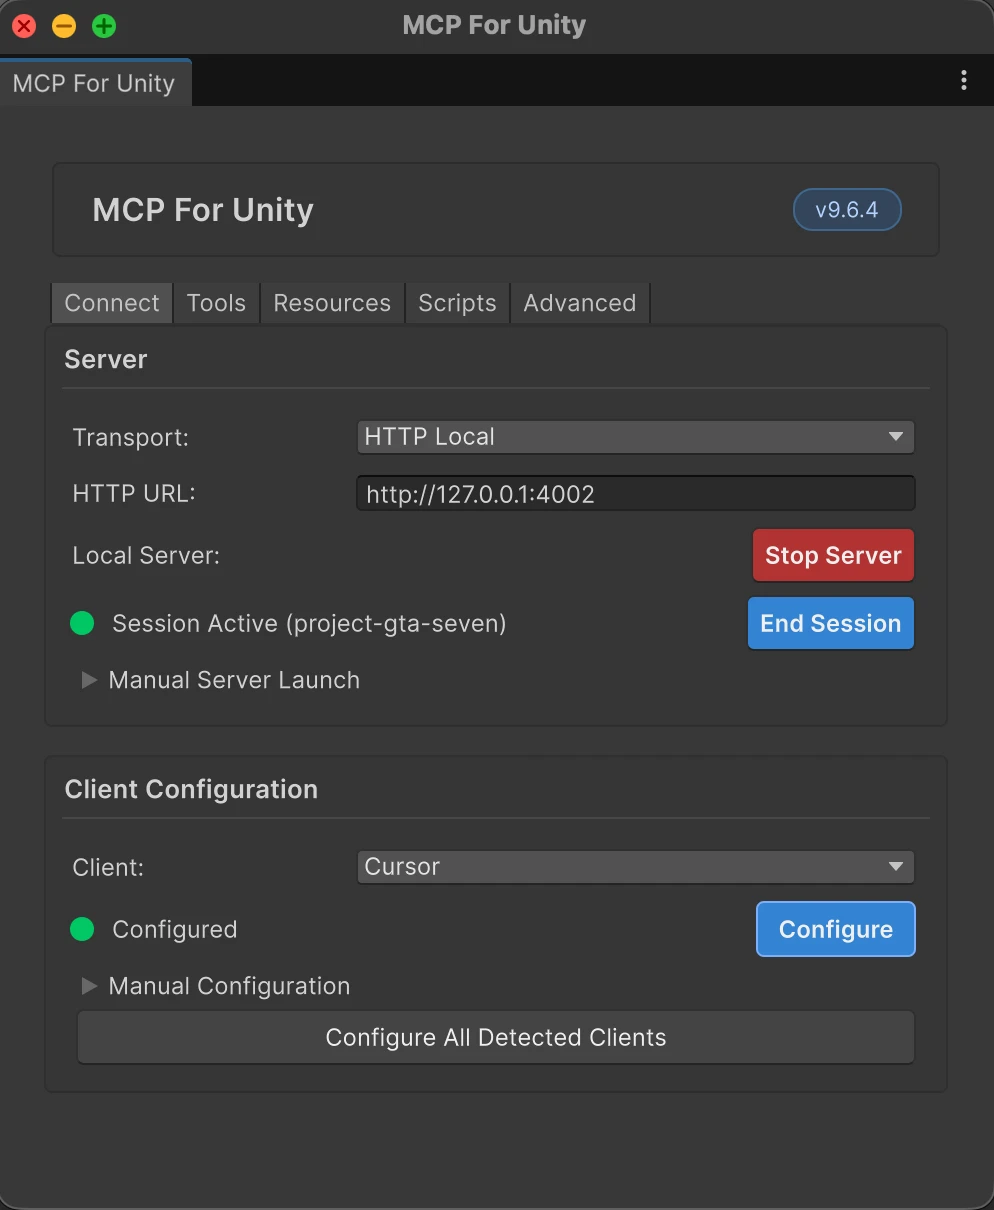
You get the MCP For Unity window on the Connect tab. There are two jobs. First start the local HTTP server. Second pick your IDE under Client Configuration and run Configure.
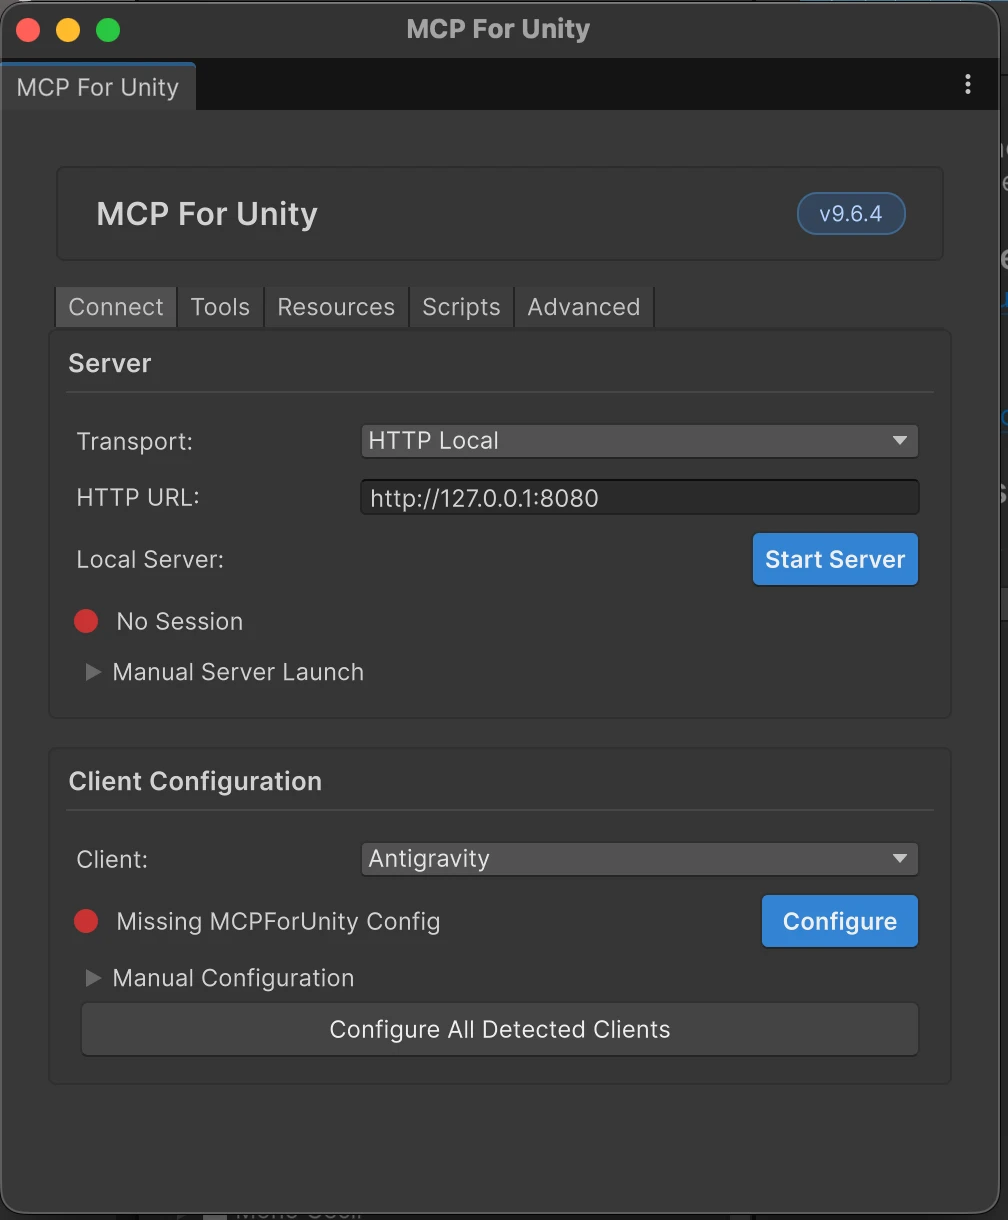
Under Server, I leave Transport on HTTP Local. Set HTTP URL to loopback plus a port that is actually free on your machine. The field may default to something like port 8000. That port was already taken on my setup, so I switched to http://127.0.0.1:4002. Use any free port you like and keep the same host and port in your MCP client config later.
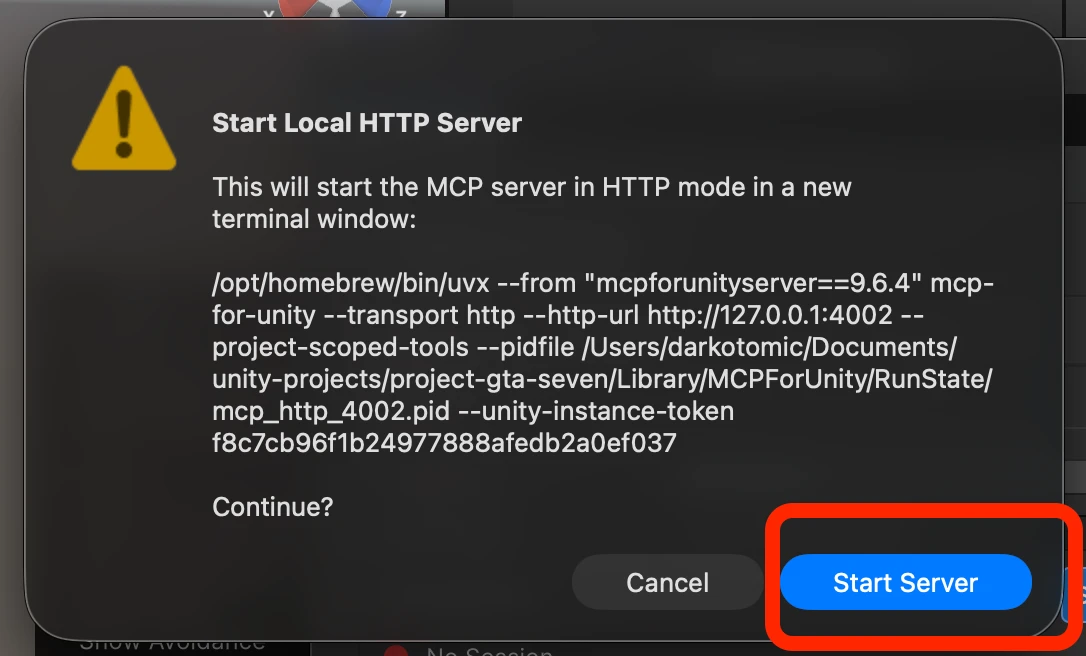
Click Start Server. Unity can show a confirmation dialog with the full uvx command. Confirm with Start Server so it can open a terminal and bring the server up.
When the server is running, the status line should show an active session (exact wording depends on the package version).
Under Client Configuration, open the Client dropdown and choose your editor. I use Cursor.
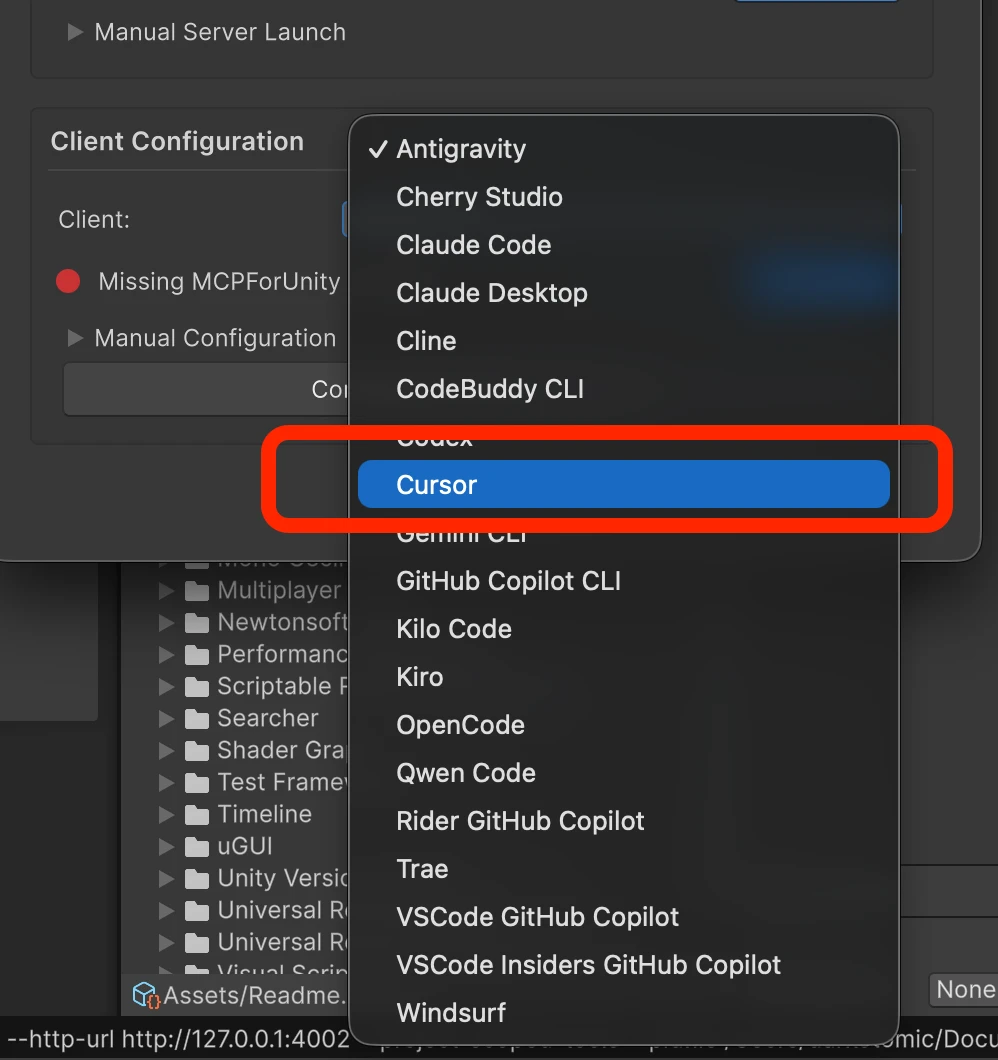
Click Configure so MCP for Unity can register this project with that client. When it succeeds you should see green Configured (or similar) and the server area should still show the session as active.
If the client line stays red, expand Manual Configuration in that window and copy the JSON into your MCP settings. Point the client at the same HTTP URL you set above (including the port).
How do I run MCP in Unity?
With Cursor connected and the Unity server session active, I check that the assistant actually sees the bridge. I ask a plain question such as whether it is aware of Unity MCP or the unityMCP tools. If it confirms and can name the integration, the client side is alive.
Then I give it a small scene task. I asked it to create a cube at the center, add a plane underneath, and make the cube blue. Cursor reasons about which MCP tools to call, then shows a confirmation panel for each step (for example manage_gameobject). I click Run when I want that call to hit the Editor. Cursor stays in Waiting for Approval until I approve.
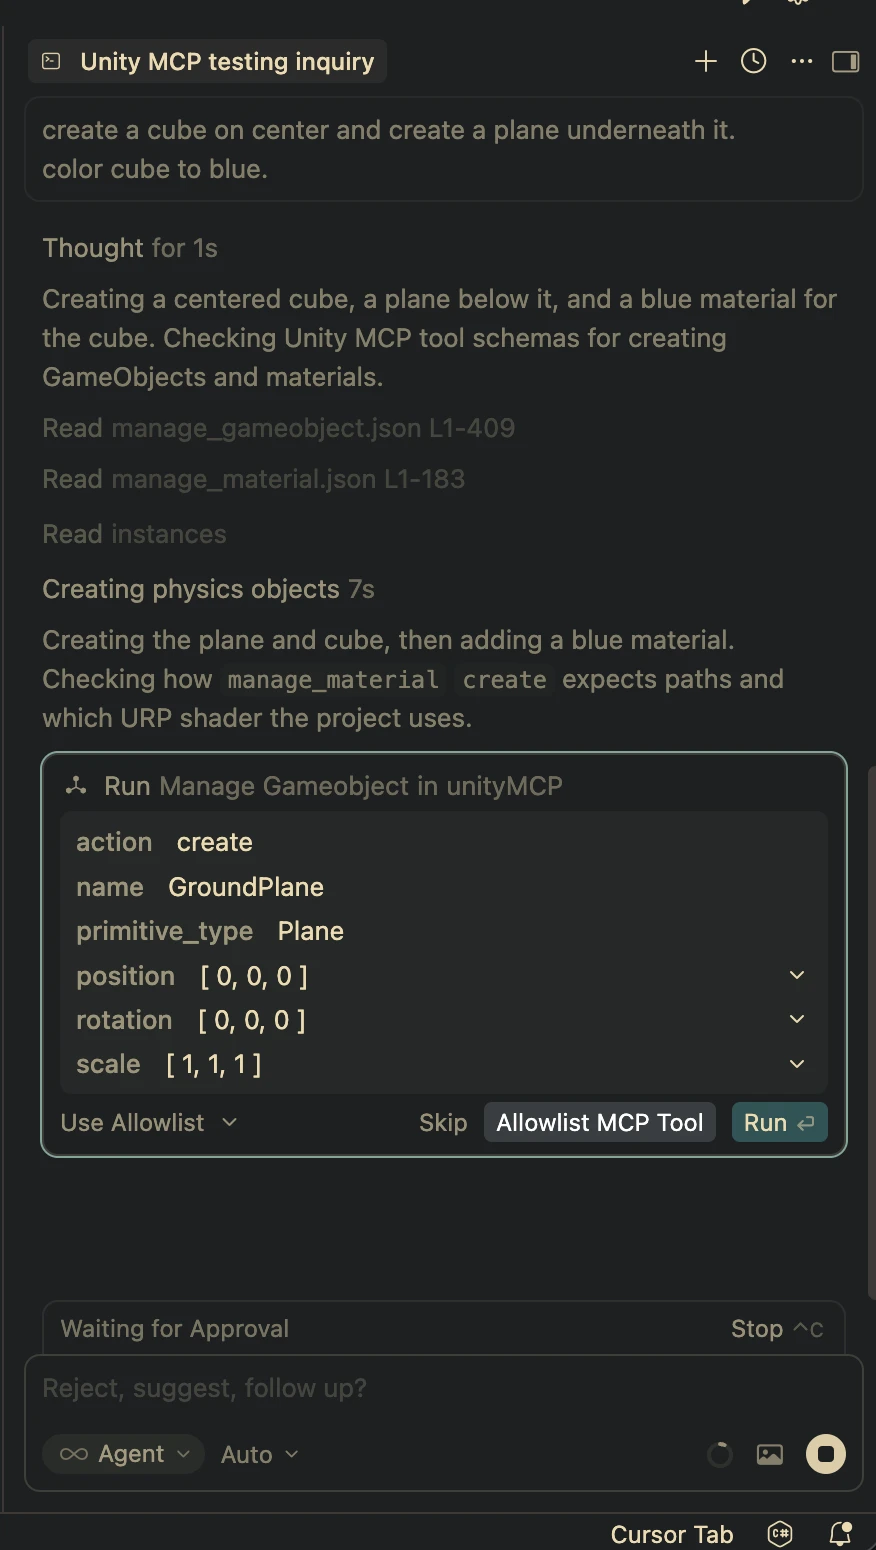
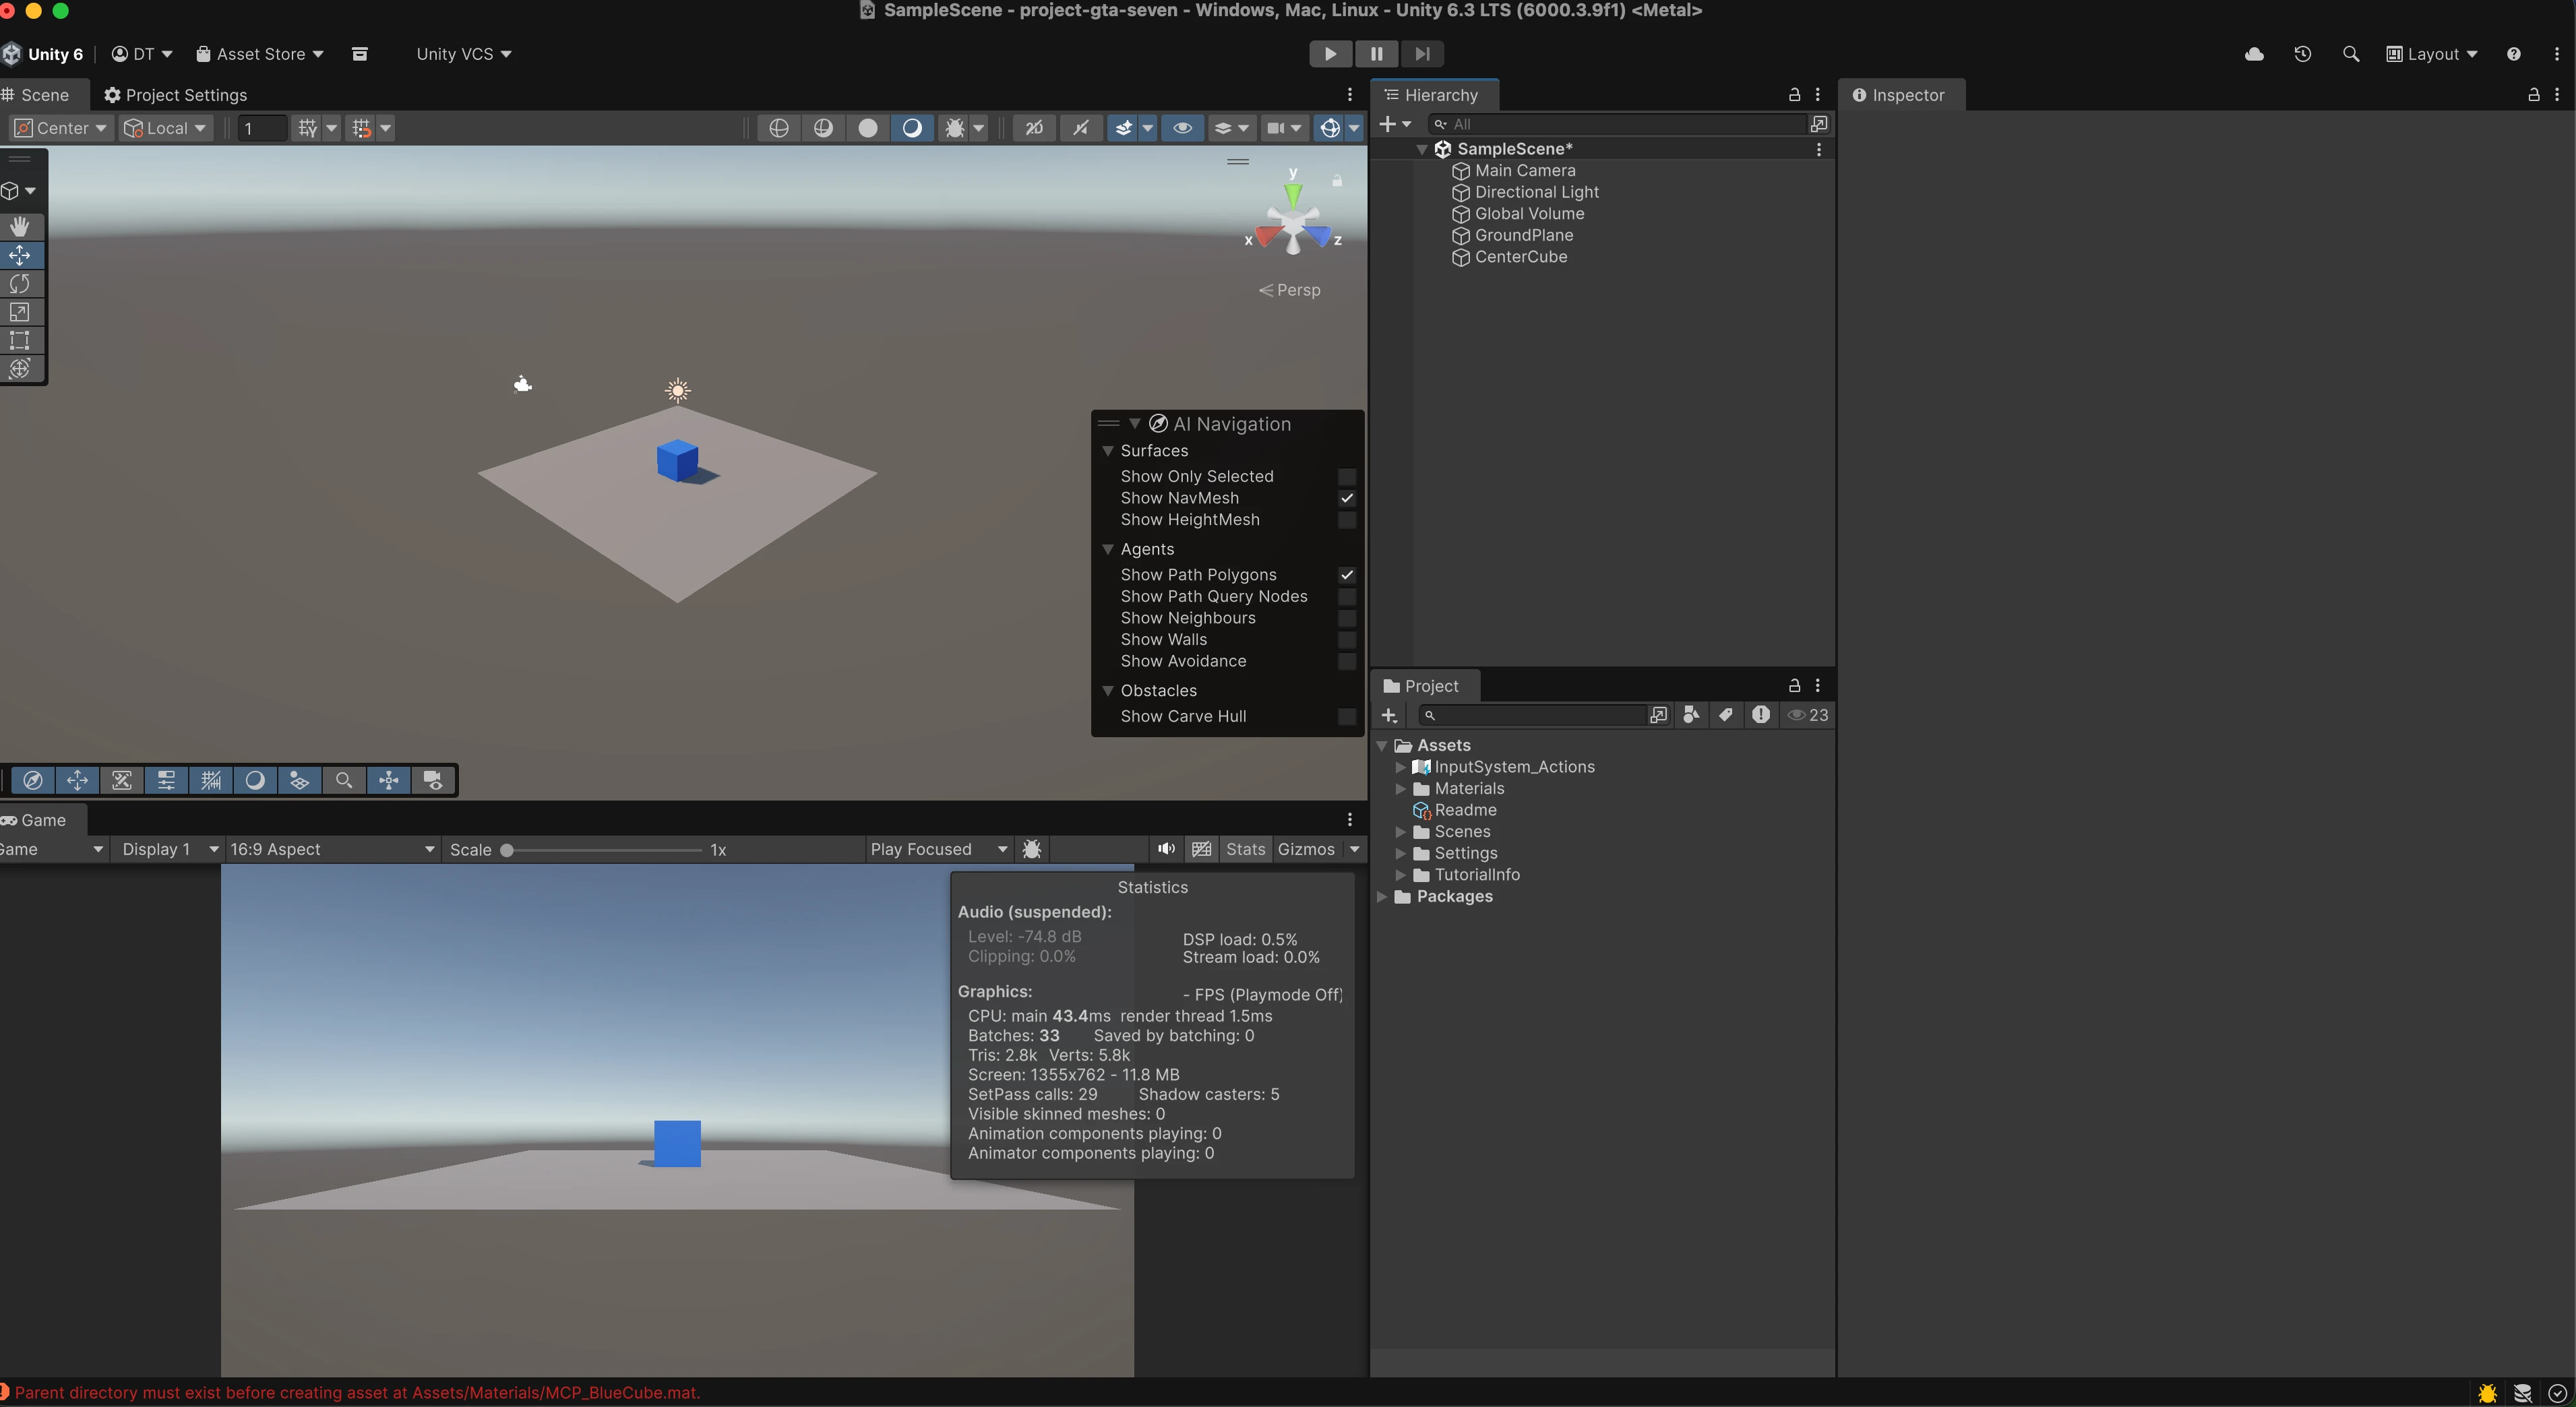
In Unity the Hierarchy should list the new objects and the Scene view should match the request. The screenshot below is the confirmation that Cursor and MCP actually did the work. In my run I got a GroundPlane, a CenterCube at the center, and the cube is blue in Scene and Game.
If a tool call fails, read the Unity Console and the chat trace, fix the issue, and send a follow up prompt. The loop is normal.
The part that matters most for day to day work is that MCP for Unity can change the Editor itself, not only what happens at Play time or in a shipped build. The tools edit scenes, assets, and project setup while you stay in edit mode. That is how you get layout and plumbing in place quickly without walking every menu by hand.
I did an extra test on MCP
I asked Cursor to install DOTS dependencies for the project.
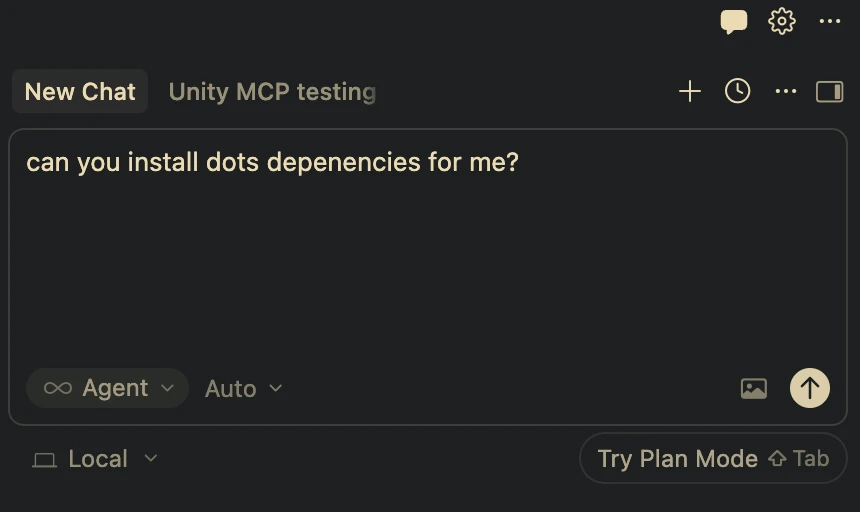
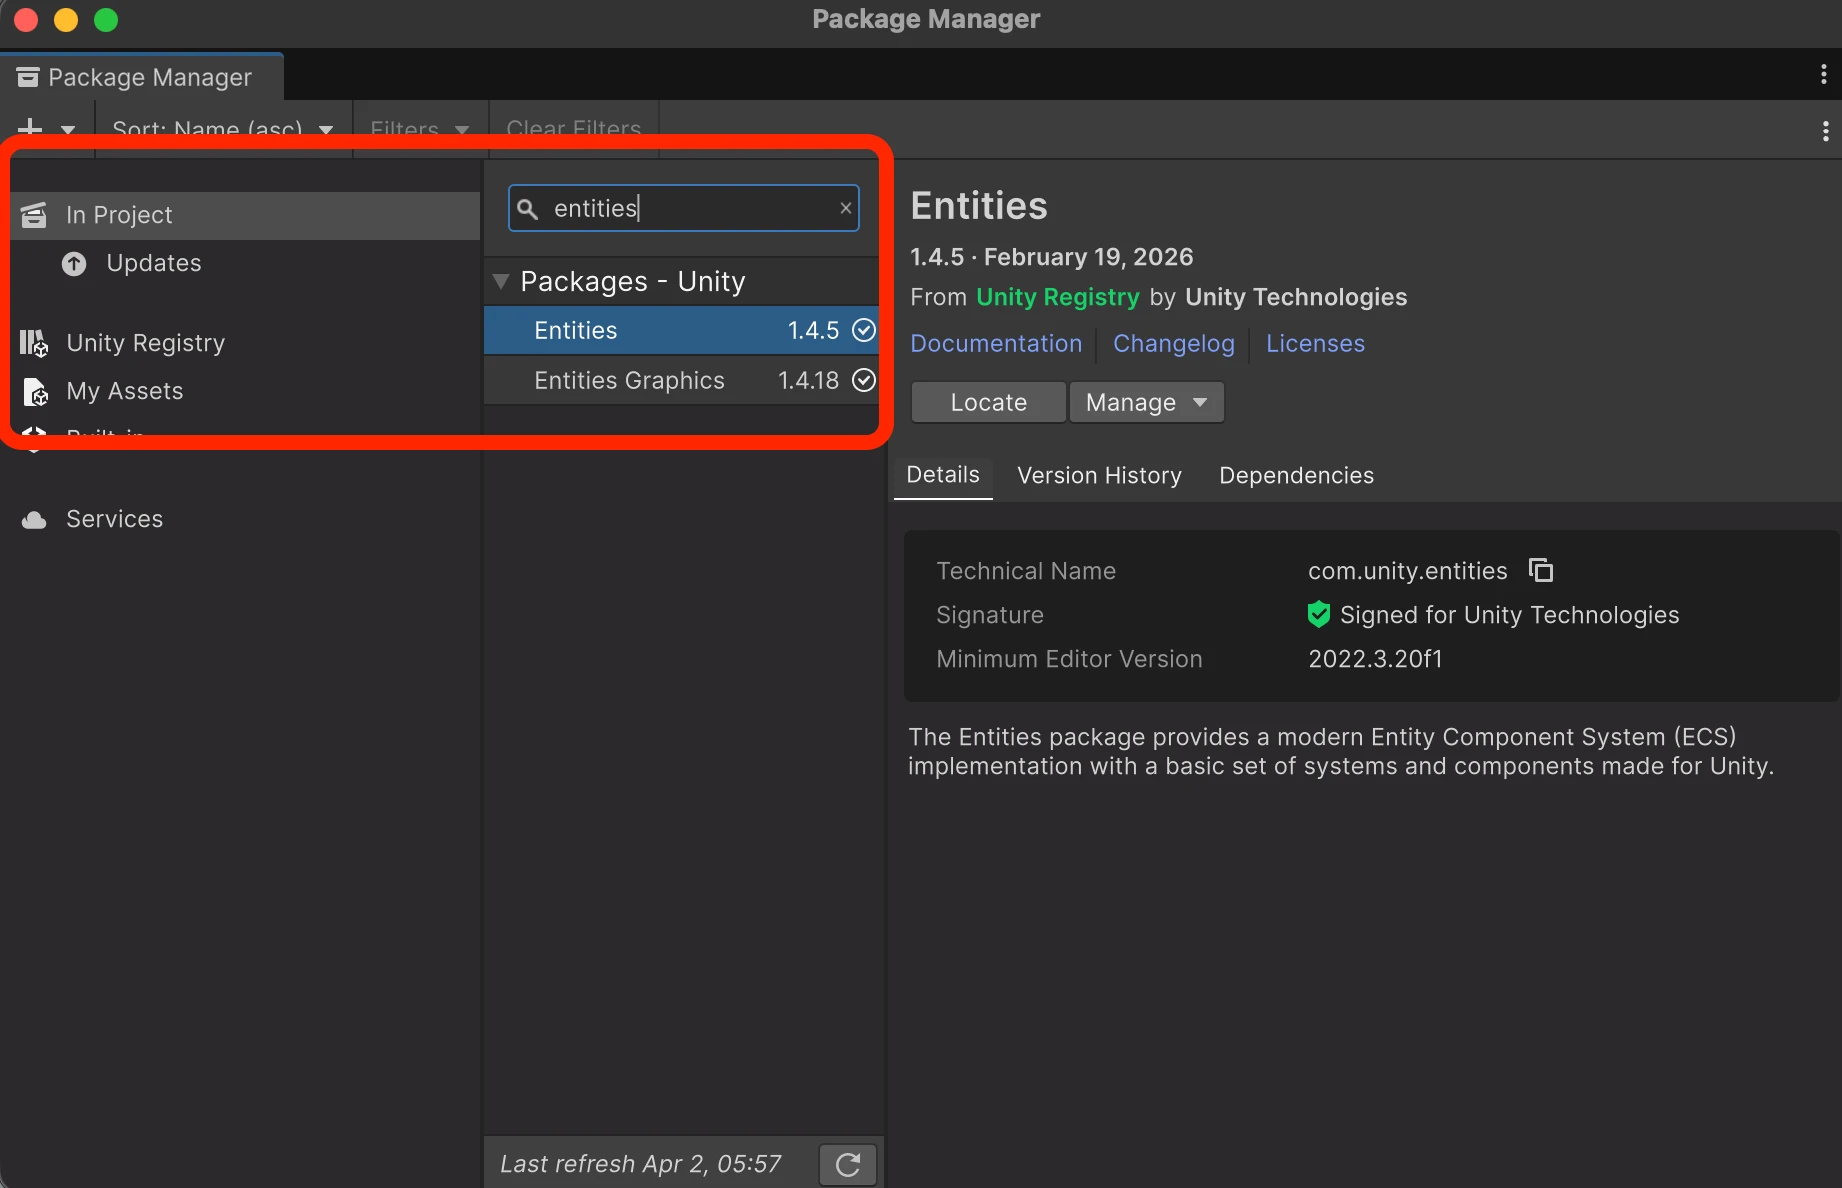
It used the Unity bridge to read my Editor version, picked compatible package versions, and ran the install through Package Manager so the packages actually resolved in the project. The screenshot below is Package Manager on In Project with Entities and Entities Graphics installed after the run.
Without MCP, the same chat often stops at editing Packages/manifest.json on disk. Unity does not always apply that instantly. You still open the Editor, wait for resolve, fix version mismatches, or click Add by hand. MCP closes that gap because the assistant runs the same path the Editor uses.
Once MCP is wired up, the same bridge can drive a full game prototype, not only package or scene plumbing. I built a Unity taekwondo demo end to end with AI in two hours using this exact setup, and posted it on LinkedIn. The write up on what AI in game development is and is not ready for in 2026 is here: addressing AI use in game development.
If you want to start with DOTS on Unity 6, read Getting started with Unity 6 DOTS and ECS in 2026. If you want the high level picture first, read What is Unity DOTS? Is Unity DOTS worth learning in 2026?.
Everything above is what you need to run MCP. The section below is extra if you want to see how this compares to Unity’s official AI.
Unity MCP vs Unity AI
These are two different things. Unity AI is Unity’s official AI inside their ecosystem. MCP for Unity is a third-party, open-source bridge. Unity did not build MCP. Coplay and the community did.
Official Unity AI goes through Unity’s product, their packages, and their access rules. MCP goes through your own MCP client (I use Cursor), your choice of model, and a local server that talks to the Editor.
I have not used Unity’s official AI for real work. When I looked, access was basically invite or signup, and I did not get in. If Unity wants a fair write-up with access, they can reach out. I use MCP because I could start immediately without waiting on that gate.
